Wednesday, March 20, 2013

Craft Room Sign

Here's a simple freebie I created to add some more detail to my craft room. 
I wanted to add some kind of framed artwork but since I chose such unique colors for the space, I had a challenging time finding something that worked. 

Yay Photoshop Elements! I have very little experience using the program but I'm so glad I spent a little extra time fiddling with it today! Enjoy! 


Tuesday, March 19, 2013

Simple Pegboard Upgrade


With my craft room remodel in full force, one area that I hadn't given much consideration to was all the little bits and pieces that I would need storage for. I really want to keep the table top free of clutter. All of the big elements came naturally but staying organized is a lifelong battle for me so I'm determined to start off in the right direction. 
The more I plan the better organized I can be...hopefully. 

So the crafty light bulb went on when I was browsing my local Freecycle site and saw a FREE pegboard was posted. Free and a pegboard?! My problems were resolving themselves! So I picked up the pegboard, which ended up being HUGE and requiring hubby and I to snap it in half to fit it in our dinky Focus. However, the two pieces I was left with were still about 4'x4', more than enough for what I had I mind and extra for hubby to use in his 
man cave/garage :) 

Now everything that goes into my craft room has to charming and beautiful, of course, so I set out to find a pretty and inexpensive way to jazz up the simple board. I thought about framing it with crown molding but the thought of purchasing it, cutting it and painting it seemed like too much work so thankfully my hubby came up with a brilliant substitute!

The previous owners of my house left behind all kinds of random home decor items, which included this frame. 


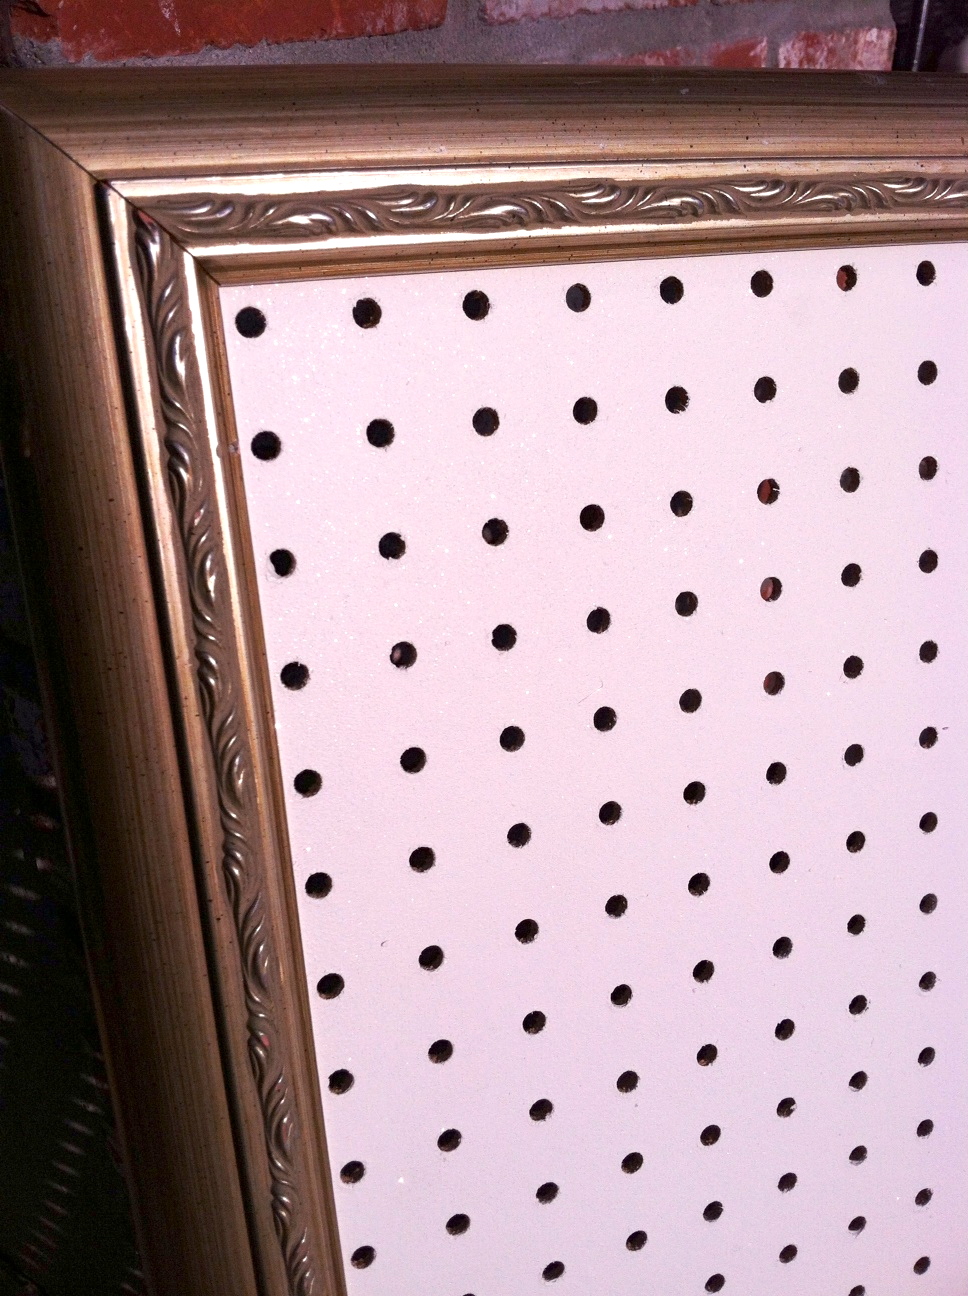
I cut open the back and pulled away the staples which allowed me to remove all of the layers of paper and the glass. I then used a piece of the removed paper to measure the exact size to cut the pegboard. After the board was cut, I used some extra paint from my wall doodle to prime the board and then add some sparkle. 


Finally, with the board dried, I slipped the freshly painted board into the old frame, repositioned the original staples. Just like that, an amazing pegboard that cost me NOTHING to make!! I did spend about $5 on more pegboard supplies but FREE is just so much more exactly so I'm sticking to that. :)


I hope you can find some inspiration to help you with your space! And if you aren't plugged into your community's Freecycle page, I highly recommend it as a great way to find some great FREE resources for repurposing and to help us keep good items out of our landfills. 

Monday, March 18, 2013

My Craft Room Accent Wall!

I can finally unveil my finished accent wall in the craft room!

Since my husband and I are on a tight budget, I've turned to paint as a way to add personality and decor all in one. With my craft room remodel, I had to add some creativity to one of the walls. To add my personal touch, I decided to doodle on the wall a simple design that I tend to draw all the time. =) 

Here's where I started:

For my paint, I just went with an off white color. Valspar Delicate White
I also bought the Valspar Paint Crystals after reading about it on Pinterest, of course. I mixed about 1 pint to roughly 1-2 tablespoons of the paint crystals. As the directions suggest, mix the crystals in gradually so they don't clump in the paint. 


Then, I used chalk to draw out my design.


Then I painted...
               and painted...
                               and painted.


It really wasn't that bad... but I am a perfectionist and question just about every line before I add it. 
I also painted 2 coats to make sure the purple didn't come through and 
to guarantee that I'd get enough sparkle. Once the paint dries, the chalk can simply be wiped with a damp towel. 

Here's the final product!
I know its a bit dramatic but it's perfect and I love it.
The room is now truly my personal sanctuary and crafting headquarters! 


Sunday, March 17, 2013

Teachers Pay Teachers Beginnings!

I'm not exactly sure what the catalyst was exactly but over the last week I've been inspired to create some new products for my Phonics and Math circles with my little Pre-Kinders. Most of them have their foundations from some activities that I've used in the past but have needed some rejuvenation to keep my kiddos interested. I would love to hear your feedback and to get any requests for new resources for Pre-K and Kindergarteners. Please follow me and rate my new products!

Friday, March 1, 2013

Craft Room: Phase 1

With the new house, I've been creating quite a list of DIY projects and creating a terrifying mess in my spare bedroom. Note the chaos below...


Obviously, nothing constructive was coming out of this mess so before I tackled any new projects, I decided to put all my energy into turning this room around and getting my craft room underway. 

After moving out all the crafting madness, I painted! Yay for more painting...ugh. Note the sarcasm. I went with Behr Premium Plus Ultra paint in Pristine Petal. I only had them include 75% of the pigment though so it wasn't so dark.

Color Scheme Thoughts:


It looks a bit darker in these pictures but I love it and find it so dramatic!
I'm planning to free paint some kind of design on one wall in the lighter tan color (Smoked Oyster). I'm having some hesitation starting the next step so I moved onto the craft table. More to follow!!